Monday, March 27, 2006

SP's Wheels and Brakes

A couple people have asked me bout the SP's wheels and brakes so here's a close up..

Front Brakes are Wilwood Dynapro 4 piston billet aluminium calipers with 276mm slotted rotors from DBA. Would love to go to a 295mm two-piece (aluminium bell) setup if and when the $$$$ materializes. Brake pads are Wilwood Polymatrix E-Compound. Master cylinder size is 1". Brake lines are Goodridge 600 series. Wheels are SSR Type C 16" 7" Offset 42 PCD100 4 lug but I'm running a 12mm spacer so effective front offset is +30mm. Also running longer 66mm Ralliart Group N lugs as the stock lugs does not offer enough thread for the lugnuts due to the spacer. Lugnuts are 7075 Anodized CNC Machined Aluminium items from Racing Gear @ Compomotive UK. Master cylinder size is 1" from an EVO1-3 (up from stock 15/16"). Cost so far is errrrm..

Thursday, March 23, 2006

R3 Stage 3 4-1 Header - The Full Rundown

It is important to remember that an engine is essentially a big air pump. While the cams and ports work to ingest the air the exhaust must be there to maintain the vacuum effect. While forced induction or turbocharged engines use an air compressor that is driven via the exhaust to spool the air into the engine, a Normally/Naturally Aspirated engine is totally relying on Mother Nature and the Laws of Physics. But remember what goes into the engine, must also come out. Header tuning is getting the length, diameter and merge of the pipes right to maintain or even enhance this air pump effect via scavenging. Get the combination wrong and you lose power. Simple as that. I'm not going to go into detail on header theory for my post though. You can read bout it more at Burns Stainless . Tuan aka Michael Delaney has also written an excellent on header at the Team Integra website.

With the build engine being used by the SP, I was really looking for a long primary 4-2-1 header but this was not to be despite numerous emails to TH Motorsport in the UK. For one thing they wanted to sell me the header used in the Kermit M21 racecar for 550 GBP not including shipping. The other was when I said "Yes, I'm ok to pay" they never got back to me despite several emails. Believe it or not. Talk about poor customer service. I can tell you that with the spec of the 4G93 engine used on the SP, the 4-2-1 Hot Bits header I'm using is the No.1 power limiter despite extensive porting. Anyway fast forward 2-3 years and my bro, a one Adian Yein Khalid from R3 (Race Rally Research) aka Proton Motorsports finally tells me they have a decent header for me. This is the extended 4-1 Stage 3 stainless steel header for highly tuned/race spec engines and believe it or not the retail price was an unbelievable RM630. Very very reasonable considering most Jap spec headers like the Toda, Jun for Honda engines are 2+ to 3 or 4K. The long primary Hytech 4-2-1 header with anti-reversion chambers costs RM6-7K+. What price workmanship and quality? The price is simply too good to be true considering the fact that RPW from Australia was trying to sell me a similar spec header but in mild steel for nearly RM2K!!! R3 has extensively dyno tested this header and the gains are 6hp over 6000rpm for an engine with standard cam. On a race spec engine with 272 duration cams, the gains were much more at 4-5hp across the rev range from 3000rpm onwards. So much for a 4-1 header only making power at the top end huh? I've personally also seen a Mugen 4-1 header making 6hp across the rev range compared to a stock 96 spec DC2 Integra Type R header. For 98 year Honda actually went to a extended 4-1 header for the ITR. Goes to show that there is not such thing as a universal header for all engine specs. Match the header to the tune of your engine.

Now if you wanna know why stainless steel is so much better than el cheapo mild steel for header construction, you can read it 
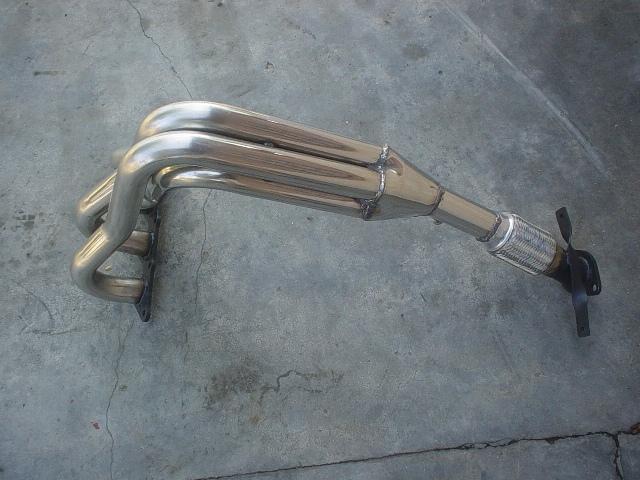
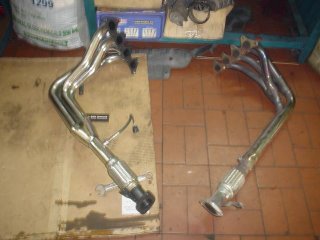
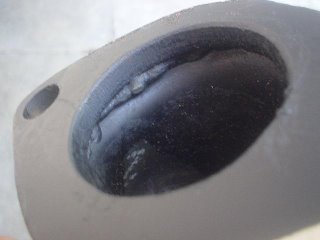
here. Would have loved an Inconel or Ti header but I doubt I'll ever save up enough. Anyway, a couple phone calls and sms messages and foolah the header was at my doorstep. Anyway that was way back in August last year and I'm now using the second generation improved production quality header at the same list price. Picture below of the R3 header ready for installation. As stated the header tubes including the flex joint or "pineapple" is made from stainless steel. The top inlet flange and single outlet pipe flange are however made from mild steel and finished with high temp black paint.

Compared to the earlier spec header I was testing out previously, this header uses thicker gauge stainless steel so should be much more durable in the long run. R3 have also tried to improved on the quality and welding of the "R3" logo on the no.1 header tube.
Picture below of the earlier spec header with "R3" logo.

Picture below of the latest spec header. Nice try at robotic "fish scale welds"

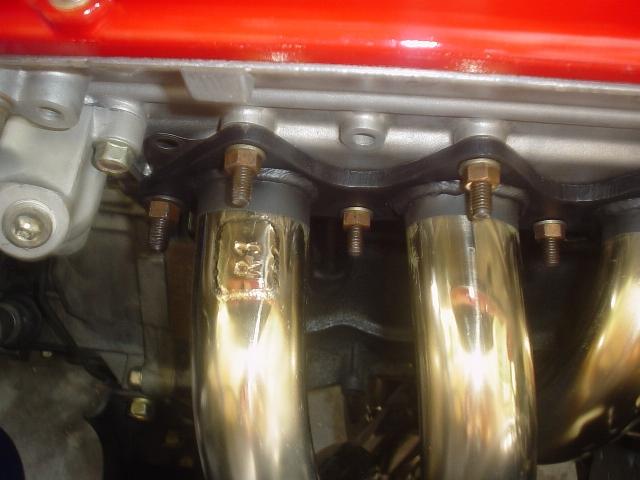
I'm using a better quality header gasket for my latest install. Picture below of how large the 4-1 header is compared to a standard 4-2-1 Hot Bits header. Not only are the primaries much longer on the R3 4-1 but larger in diameter too. Sorry bout the picture quality. Shakey hands when taking the pix..

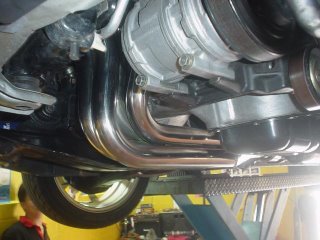
Picture below of how much the R3 Stage 3 4-1 header extends down below the oil sump. If your car's slammed you might want to be very careful especially when going over bumps.

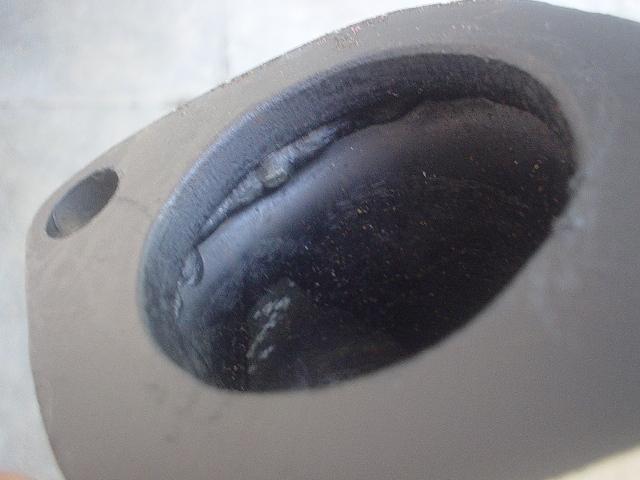
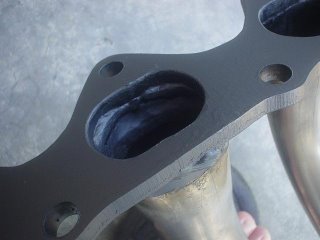
Being like any other mass production header there is quite a lot of excess weld left on the flanges. This should be remove via a dremel as it impedes exhaust flow.


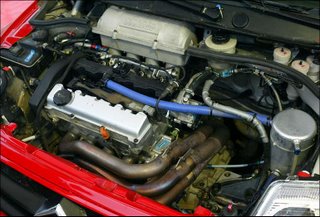
Takes about 2-3 hours max to install the header including porting the flanges. Installation was pretty much bolt-on though some muscle was needed to line everything up properly. The power steering pump and radiator fan will have to be removed during the installation. A hydraulic lift is a must and the header should be removed and installed from the bottom of the car rather than on top. Much easier this way. Oh, and please wipe the header of your greasy oily fingerprints before starting up the car else these will permanently be on your header leaving unsightly stains and marks. Picture below of the header turning a nice gold hue after a few power runs.

So I guess most of you all are wondering how is the power after the header install? All I can say is that the power gains are everywhere on my engine and not just at the top end. Top end of course is much much better making so much easier for the SP to pull to it's redline. I've yet to dyno the SP and probably won't be doing so unless they can have a dyno in Penang but I'm willing to bet anyone that the gains from the header are a lot. Wouldn't be surprise if it made more than 5-6hp additional over the standard Hot Bits 4-2-1 header.

As I've posted in TMM previously "Took the car for a nice drive on Sunday morning to butt dyno. Took the car to 3000rpm, 4000rpm, 5000rpm... 9000rpm!!! Whoa!!! The car keep pulling and pulling.. Top end pull is damn sweet and definitely way more than my Hotbits 4-2-1. Had a nice time whacking the car left right centre... Exhaust note also sounds different and even boxer note like. Must be due to the different config of the primaries. I'm pretty sure the max power output way up is bout 3-5hp more but short of dynoing the car I can't confirm bout gains or losses anywhere in the curve.."

BTW, here' a picture of the Super 1600 (Junior WRC) Citroen C2's engine bay. Notice how long and large the header primaries are for top end power.

I'll like to end this post by saying that the gains are what I felt for the SP. This does not mean that the effect will be the same for every 4G93P. In fact R3 does not recommend this header to 4G93Ps running the R3 Stage2 cams as apparently there will be a power loss. As I've stated before, match the header to your engine spec. If you're unsure call R3. They're a pretty helpful bunch of folks.

I would still like to try a 4-2-1 long primary header one day. This is really the best config for engines running big cams and big compression. Proven many times over. Hopefully R3 will make one for me. Apparently they did try a prototype LP 4-2-1 but this was too expensive to mass manufacture. IMHO I personally wouldn't mind paying RM1.5K or more for a header if there are gains and the workmanship is top notch. However this is just me and maybe a couple of buddies and hardcore mod enthusiasts and not the majority. In fact I wouldn't be surprised if people complained RM600+ is too expensive for a header. Such is the state of our tuning industry. Sorry for the rant..

Sunday, March 12, 2006

R3 Stage 3 4-1 Header

For those with heavily worked and modded 4G93 NA engines running big overlap cams and ported heads, finally there is a decent header in the market. R3 recently launched the R3 Competition Exhaust Manifold (Extended 4-1 Design) and I was amongst the first to place an order for this header. Just fitted the latest spec header last weekend. Full report and details to follow when I can get some free time. My apologies..

Friday, March 10, 2006

TMM Archives - Exedy Performance Clutch

If you have a stock engine or even one with standard bolt on mods such as i/h/e (intake/header/exhaust)the stock clutch will more than suffice. However once your engine is making 30% or more power it's time to upgrade. The stock clutch is also prone to overheating and baulking (sticking to the flywheel) when slipped too much in traffic light drags. When baulking happens, shifting becomes hard and in some cases you won't even be able to engage a gear. Not good!

Our clutch and flywheel shares the same as the Mitsubishi CA4A MIVEC so we're in luck. The stock clutch plate has a 215mm diameter. Lotsa imported options available including Alcon, Toda, Cusco, Helix Autosport and Exedy. If you want to go local you can always try Triniti. I decided to upgrade my clutch to an Exedy Race item while having the transmission stripped for my 4.592 final drive install. The Exedy option is reasonably price at only RM880 (was RM950 when originally introduced to the Malaysian market) for the clutch plate and clutch cover. There are however a lot of fakes floating around so shop with caution. Price is not everything. Also despite what other mechanic or people might tell you the Exedy/Daikin clutch that you can buy with the blue/grey cover is NOT a performance clutch. That is the standard Exedy Daikin oem replacement clutch. Only those Exedy in red boxes are race/performance items. Picture below of Exedy Race Clutch Boxes

The Exedy Race clutch plate comes in 2 flavours. The 3 puck full race version and the full face round organic race/performance street version. Both use the same clutch cover. I would really recommend the full face clutch plate unless you have an all out race car and want that little last bit of grip as :
1. You can actually slip the full face clutch and the car will not judder when taking off from standstill
2. The 3 puck clutch plate wears out really fast. The material on the puck is really thin and some of my friends have had their clutch fully worn out within a year

Picture below of Exedy Race Full Face Organic Clutch plate for Mitsubishi F5M22 gearbox. Part Number is MD05S. The springs on the plate (which are required to cushion the impact when the clutch disengages from the flywheel so that you will not have an on/off effect) are really beefy compared to the stock item.

Closeup of the organic friction material

Picture of cluch cover. Part number MC05T

Reverse side of the clutch cover showing the beefy clamping plate

Oh.. before I forget I also decided to change my stock rubber clutch hose to a stainless steel braided teflon lined item from Goodridge. The effect is the same as upgrading your stock rubber brake hoses giving you a firmer and more precise clutch pedal feel. You can get the Goodridge clutch cable from Pentagon Enterprise via my bro Chris Tan.

I also decided to replace the clutch release bearing with a newer Proton oem item - Part Number MD706180. The Exedy clutch does not come with it's own release clutch release bearing. However there are reports of some shops selling the Exedy with the clutch release bearing. Not too sure on that. Perhaps some of you out there running the Exedy Race clutch might wanna comment on this? My bro Jack even got a nice vinyl "Exedy" sticker to go along with his clutch set. I never got mine. Bummer! Oh ya.. The stock flywheel also got replaced with a lightenened one piece chrome molybdenum Jun item and likewise the stock open differential with a Kaaz 1.5 way Power Pot Limited Slip Differential but I'll talk bout that another day. Installation took my mech about 2 days due to the number of parts being replaced. However if you're just replacing the clutch it should not take more than a day. Picture of the flywheel and clutch installed to crank before the gearbox bellhousing is mated to the engine block.

Overall I would say the clutch pedal feel is only about 10-15% firmer than stock. No big deal as you get to exercise your legs more. As stated earlier the clutch is very driveable and you can slip it like a stock clutch. Advantage is that it doesn't slip that much!

Wednesday, March 08, 2006

Jack's Aerocatch

Here's how Jack's monster looks like after the Aerocatch install. Fiercest looking GTi? Think the SP better lie low for a while ;-)


Friday, March 03, 2006

Jack's Infinite Bar and Plate Intercooler Install

Andrew - Bro Jacko Wacko's back with the latest round of mods. Words and pictures from the man himself..

Initially I'm quite adamant in upgrading to a Bar & Plate intercooler. Reasons is not on based on any performance gains or losses but base on space constraints on the SGTi bumper. Already the EVO 3 intercooler involves cutting a lot of that bi#%h expensive bumper and knocking of the front frame. Upgrading to a slightly larger IC will bring nightmares to my Intercooler piping guy. I'm praying hard that I dont have to cut up the bumper more.......

However, since the price of a new B&P intercooler has gone down tremendously, it'll be silly not to get one. Furthermore, the polish aluminium bling bling look is hard to resist.

Actually this intercooler is slightly shorter than the EVO 3 unit but lenght wise its longer by approx 1 - 2 inches. However, since its a B&P design the core is relatively larger than the EVO 3. Beauty of it is that the pressure drop will be less. The stock EVO 3 intercooler is well known for quite a drop in pressure.


Placing the IC at a correct location and mounting it is easy as it comes with welded on screw bungs. However, as it is longer than the EVO 3, I choose the hard way of re-routing and re-welding my intercooler hoses instead of buying off-the-self SAMCO silicone hoses. This alone took half a day!!

Intercooler hoses was finally completed and polished an hour after lunch.

Putting back the bumper was not easy.. it will not fit the first few times and only after adjustments to the bumper and some force did the bumper finally fall in place. I was relieved that I dont have to cut anything. Decided to maintain the stock look for some stealthy encounters. Overall, the cost is less than them SAMCO hoses.

Andrew - Man!!! This car's evolving faster than myself or Jack can write articles bout it's mods. Just look at the picture above. Bloody fierce looking IMHO. You don't want this sight lined up in your rear view mirror anytime. Since this picture's been taken the Monster's had it's CPS cf bonnet Aerocatched. Stay tuned for more Jacko Wacko mods.

TMM Archives - Cusco Brake Cylinder Stopper

The next time you're in the car when it's stationary and with the bonnet open, ask someone to observe the firewall when you depress the brake pedal. You'll be surprised to see how much it moves. This firewall movement is not good as it results in a mushy pedal feel and decreases the efficiency of the master cylinder's hydraulic action. Cusco Japan happens to sell a BCS (Brake or Master Cylinder Stopper) that basically bolts on to your car's master cylinder and reinforces the mounting locations for less movement. The Cusco part number for our Putra/Satria/GTI/Wira is the same as what Mitsubishi quotes for the Lancer EVO1-3 and Mirage MIVEC CA4A. The part number is 508 561A.

For some apparent reason this part and mod is not very popularly sold in Malaysian Speedparts shop but you can order them from these shops. When I was in Singapore visiting Garage R however I saw a couple (bout 4-5) units of the Cusco BCS for our cars hanging in the racks and gathering dust. The price offered by Garage R is very very competitive to what you can get in Malaysia and much cheaper compared to mail order. I quickly grabbed the part and paid for it despite not so happy glances from my other half.

Picture below of what you get with the Cusco BCS Kit Part Number 508 561A. Instructions are in Japanese but with hand drawn diagrams I kid you not.

For something that costs a couple hundred bucks I was really dissapointed with the cheap mild steel fasteners that came with the kit and decided to order equivalent titanium and stainless steel items. One week later and I was ready to install. Installation was a breeze and took about 30 minutes. Picture of the installed BCS.

As expected, brake pedal feel was much improved and stiffen after the installation of the Cusco BCS. All in all a pretty cost effective mod which I recommend only if you've already upgraded your brake hoses to stainless steel braided teflon lined items. That should be the no.1 mod to improve brake feel and reduce fade from expanding stock rubber brake hoses.