Jack's new R&D project. Article written by Jack himself.
This just installed over the weekend.. suppose to be a straight forward install since the boot fit perfectly to the engine head. The tricky part was sorted out i.e. the mounting plate. Since I did not know if this will work the aluminium mounting plate was not sent for lazercutting. It was done the old fashion was via a saw and a filer.

Where the coils came from
The install came down to making sure the wiring was done properly. As usual my Mech boasted that he can do this with one eyes closed. I complied and went on my business painting the cam cover. Lo-and-behold when we started the car it misfire and stumble badly during boost.... The problem with COP install began to creep up on me from posting on the net. There were issues on no rpm readings, low idle misfire to WOT high boost stumble and incorrect dwell time setting. My mech said I needed to retune the car. Feeling shitty, i went home disappointed and contemplate to GT auto or go back to the OEM ignition. After spending hours on the net. I figured that my mech did the wiring wrongly. He wired the coils in parallel instead of in series. In parallel the direct 12v to the coils lowered the resistance and caused the ignitor or Power Transistor Unit (PTU) to go haywire. The car in-turn will misfire, stumble and rpm readings will go nuts. Lancerregister and various DSM forums advised to rewire it in series and to their diagram and also regap the plugs to 0.026in or 0.6604mm.

The correct wiring diagram
I ask mech to open shop yesterday and we proceeded to make a rough wiring diagram from spare wiring lying around the shop. The car started and it idle like a dream, RPM works and no misfire at boost!! Home run!! Tested the car and did not notice and power differences. As expected, since I'm still having the wasted spark ignition system. A COP just replaced the 2 coils with 4 and no plug wires. I only notice that the car idle smoother and pulls harder. This is probably due to the fact that my old chop shop coils are badly worn or its just the new toy talking. Instead of 'chopping' another set for the yard. I might as well get 4 coils for the same price. You do have to pay extra for the shipping and fabricating the mounting plate. They came with all the wiring, sockets and boot. You just need to wire them and fabricate a plate to mount them. The Supras, DSM and Mitsubishi community in yankee land have been doing this for years. This is the final result on a 4G93T:

The wiring was done nicely. All covered and connections was soldered and shrink wrapped. I even had my mech build a 3pin connector to my 2 Nology coils. So instead of splicing into the wiring it will just be a clean snap on with the connectors. 

There are still arguments on its actual performance gains. Some say its a waste of money and some say its wort it. But the consensus is that this is only worthwhile if you have
1) Standalone ECU that can control the coil dwell time and
2) that can also do sequential.
3) You will be going CDI
To me the way it looked alone is worth it and if I wanted to I can go 2 & 3 via the Haltech ecu and a CDI box. The COP do run a lower coil dwell time as they arguably have lower resistance. The dual coils on the OEM takes longer to charge. My previous parallel wiring probably lowered resistance to much and cause the of the coil to discharge prematurely causing the engine to misfire and messed up my RPM signal.
According to my Haltech Manual, the typical settings for dwell time for dual coils are 3.5ms and COP 1.8ms. I will have to adjust that later to ensure that the coils last and don't burn itself from being overcharged. I'm impressed how the coils fit the 4G93T head and plugs without much fuss and how the engine bay looked now. I think its worth-it although no performance gains now but I'm sure the coils worked better than my dunno-how-old-beat-up-chop-shop OEM coils that are beginning to leak.
 The cooler with all the fittings and brackets minus the hose and sandwich plate
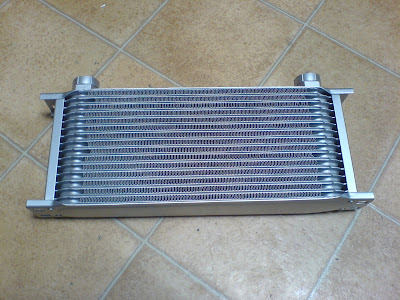


 Cooler installed (All fasteners were changed to Aluminium Potassium Bichromate soon after)
