Tuesday, February 28, 2006

Fasteners

Blame it on the first detailed engine bay shot I saw of the Lancer EVO3 and Subaru Impreza Group A Rally Cars more than 8 years ago in Racecar Engineering journal. What caught my eye most then was the abundance of yellowish gold coloured fasteners adourning the engine bay. A quick research led me to the world of lightweight fastener technology. This is a good way to lose weight on any vehicle but at a price! A M6 X 16mm aluminium socket head bolt will cost about RM1.20 for example compared to a couple cents for a mild steel version.

The SP has had more than 400 of it's bolts and washers replaced with aerospace items in the last 5 years. Proton uses metric sized fasteners on it's cars including the Putra. I am using aluminium and titanium fasteners in socket cap (allen) head, hexagon or flanged hexagon head styles. Common stainless steel is also sometimes used (when I can't afford Ti and aluminium is too weak). In general each material has it's strengths and weaknesses in which I'll try to cover. Hope I don't bore you to death.

Aluminium
I generally use aluminium fasteners on non-load bearing (non-stressed) areas. These are 7075T73 high tensile material and are either potassium bichromate coated (yellowish goldish tinge) or anodized (avail in red, blue, green, silver, black, purple and gold). Anodized aluminium fasteners are slightly more expensive than PB coated aluminium fasteners but do look better aesthetically (to most people). Beauty however is in the eye of the beholder as I prefer the PB coated AL fasteners. Also PB coated fasteners will not suffer from colour fading due to heat stress unlike anodizing. Aluminium has only 40% the mass of mild steel but unfortunately isn't as strong. You don't want those backyard special rougho macho mechs tightening these fasteners as they will strip them in no time. Picture below of aluminium fasteners with PB coating. Most Brit race teams including WRC, BTCC and GT teams use them a lot. Next time you look at racecars, try to spot them.

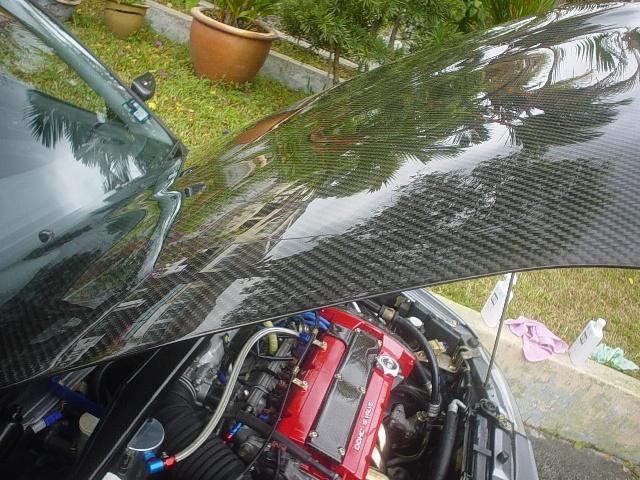
Picture below shows M6 X 20 sized socket cap head bolts and washers used on the SP's engine timing belt cover. M8 sized bolts are used to secure the power steering and air-conditioning lines.

Titanium
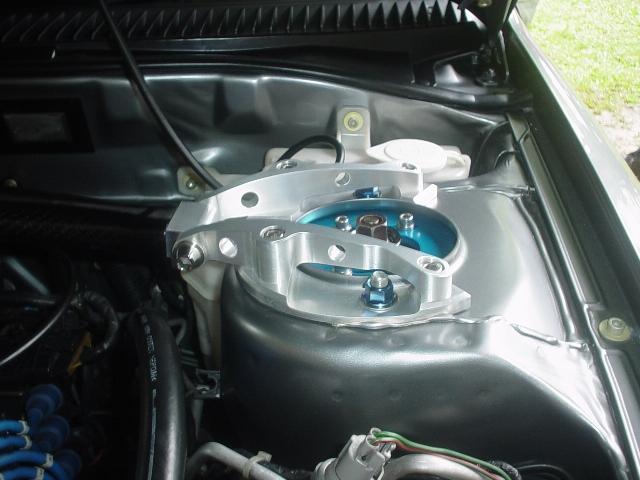
Titanium sounds cool, looks cool but unfortunately is most expensively NOT cool! The price is simply unimaginable. To give you a contrast the aluminium M6 bolt which I mentioned earlier might cost more than RM1 depending on the exchange rate. The titanium version will cost 10-15 times more. You'll have to shop around the Ti bolt suppliers as generally the price will vary quite a bit though it's the difference between stupendously expensive and very expensive. There are very few Ti fasteners on the SP and these are used for load bearing areas like the front and rear shock absorber top mounts and on the strut bars. The Ti material most widely used in motorsport fastener applications is Grade 5 titanium or 6AL-4V. This material has 60% the mass of mild steel which means that it's heavier than aluminium. The plus point is that titanium is very very strong, hard and stiff. Titanium is also very corrosion resistant and can be colour anodized (only in gold and blue though. Have not seen other colours). Care also has to be taken when tightening Ti fasteners as exceeding the quoted torque setting will cause galling. This is when the Ti bolt is sort of cold welded and no matter what you do you won't be able to loosen the fastener. And since Ti is super hard and strong, God Bless! Having said that I do not have any problems with galling (touch wood) though to eliminate this problem you might want to apply anti-seize or moly paste to the threads of a Ti bolt before fastening. Picture below of Ti bolts, washers and nuts used on my strut bar. Ti socket cap head bolts tend to have the head tapered to distinguish them from garden variety stainless or aluminium bolts.

Picture of blue anodized Ti flanged nuts used for my shock absorber top mounts. The one smaller nut is for my Cusco Master Cylinder Stopper. Sorry, the magazine and hot babe on the cover is not included.

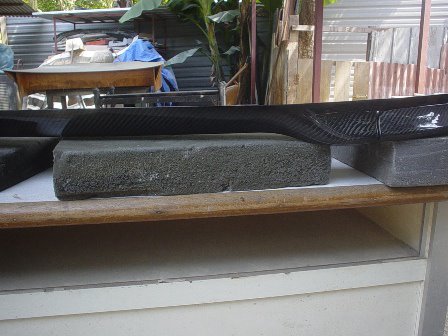
The Ti fasteners on my front carbon strut bar and front damper "pillow ball" top mounts

I guess I don't have to go into detail on stainless steel as most of you should be pretty familiar with this material. Oh and before I forget below are some of the suppliers of aerospace fasteners for motorsport or fast road application. Happy fastening!
AWF Pro-Bolt (UK)Supplies Prodrive WRC team.
Hyper Bolt (UK)
Poggipolini SPA (Italy). Supplies Ferrari F1 and Ducati WSB teams amongst others.
Mettec (US)
Redmist Motorsports (US)
SDC Tanaka (Japan)

Sunday, February 26, 2006

R3 Floor Matts

Decided to replace my old and avail in any colour so long as it's grey USPD floor matts with R3 items last Friday. These matts have been with me since day 1 and I never did liked them or the greyness they gave to the already unispiring Proton interior so it's quite surprising they lasted with me so long.

A drive to the Proton Edar Juru Parts Centre and RM200 poorer later, I'm home with the new matts. The quality of these matts are excellent. One would say even too good for just a Proton ;). The material used is cutpile carpet which is what they also use in hotels. The matts are black but feature red stiching for that oh so racy I have a Type R look. Oh and the R3 matts are way lighter than my old ones too. IMHO and excellent though not cheap mod to increase the feel and ambience of the interior.

Picture of front driver side floor matt compared with the stock USPD matt

Passenger side comparison

Rear comparison

Bottom side of the R3 matt features a lof of sharp pins to ensure excellent grip. Dangerous to have the matt moving around when you're whacking corners.

Picture of SP's cockpit/cabin driver side with the R3 matt fitted. Looks much more classy and racy. Type Rrrrrrrrrr.

Front passenger side

Saturday, February 25, 2006

SP's New Front Grille

The front grille fitted to SP was getting a bit long in the tooth. It was the export spec grille complete with then Proton export spec "flower" logo mark top fitted more than 5 years ago. Since then Proton has moved and standardized both the local and export spec logo to the current "Thundercats" logo. I decided to get the latest grille from the facelifted Wira/Satria as this grille looked the best to me aesthetically. This is also the same grille fitted to the Arena. The new grille also features larger vents with a honeycomb wire mesh design that is more with current fashion (ala Golf GTI). The larger vents should theoretically provide better airflow. I was pleasantly surprised to find the new grille and mark top logo without paint costs only RM70 from Proton. Was even more surprised to find the new grille weighing less than the old grille. Picture below of the new grille painted. Overall cost including paint was approximately Rm250+ Yes.. the painting costs more than the price of the grille itself as I had to repaint parts of my bumper where the old grille rubbed some paint off unfortunately.

Installation took about 15 minutes and the new grille is simply bolt-on without any mods needed to the mount flange or clips.
Picture of SP with the old grille

Picture of SP with the new grille for comparison

The new grille looks more up to date and "fiercer". Carbon slam panel fitted the new grille perfectly. No worries.

Wednesday, February 15, 2006

SP gets a Carbon Bonnet

Getting things done to your expectations is not easy I can tell you. For one thing it takes money and lotsa what you call the BST (Blood, Sweat and Tears) factor. For those who know me well the gestation of my full carbon bonnet has taken a very very long time. One year+ in the making easily. During this time 2 moulds and 3 bonnets were developed all which failed my own personal standards. Blame it on too much oggling of race car mags and their carbon artistry work. But first lets set the facts straight on carbon composite technology. Please don't fall asleep.

Now as much as the guy in the next Batman car would like you to believe, not all carbon bonnets or for that matter carbon parts are the same. Also there's no such thing as Grade A carbon, etc. The technology used can be summed up into 2 main ways of manufacturing carbon composite parts. These are wet-lay up (what the Japs like to call "wet" carbon") and pre-preg ("dry carbon"). A wet lay up when you lay the carbon cloth in the mould and then pour and roll the resin (liquid chemical "glue" in the simplest lay man explanation) over the cloth till you are satisfied with the saturation. A pre-preg carbon part is when the carbon cloth comes to you with the resin directly saturated in it already. A pre-preg carbon part is typically 2-3 times more expensive than a similiar wet-layup carbon part. This is because the pre-preg carbon cloth has to be shipped in refrigerated containers as the cloth will typically cure and harden when exposed to room temperature. The shelf life of pp material is also limited to weeks. While it would be preferable to use pre-preg carbon all the time you and I know that's virtuall impossible unless you have an F1 sized budget. It's also possible to get the quality of a wet lay-up part similiar to pre-preg and this is where the skill of the carbon laminator comes to play. I shall concentrate more on "wet" carbon technology as this is what most of us can afford.

There's a lot of hearsay and mumbo jumbo going around in local forums but contrary to popular belief not even wet lay-up carbon bonnets are all the same. In general your RM800 "wet" cf bonnet is not the same as another RM3000 "wet" cf bonnet. The adage "You get what you pay for" applies. When purchasing a carbon bonnet you will want to ask a few question. These are :

1. What is the resin used? Now this is most important I tell you. Again contrary to popular belief a big part of the strength of a carbon part comes from the resin itself. There are hundreds of types of resins or matrices used from cheapo polyester gel coats to vinyl ester (used by TVR for the Sagaris) to epoxy for which there are possibly hundreds of types and applications alone. To give you a run down the most expensive epoxy resin alone can cost 20 times more than the the cheapest polyester resin. Having said that it's perfectly ok to use gel coats for majority of performance or fast road applications.
2. Is the carbon part vacuum bagged? This is where the laminated carbon part is covered with a plastic bag and air is sucked out via a pump. This results is better saturation of the resin and ultimately better surface quality
3. How many layers of carbon? I can tell you the majority of carbon bonnets in our local market should really be called carbon reinforced fibreglass bonnets. These are really nothing more than fibreglass bonnets with one layer of carbon on top (if you py more another layer of carbon on the bottom under skeleton) for decorative purposes. Fibreglass is ok but nowhere near the lightness and strength of carbon.
4. Weight. Stock bonnet weights 14+ kg so you're ok if the carbon bonnet weights 6-8kg.
5. Is the bonnet clearcoated for UV protection?

There are many other factors to consider but most local carbon part manufacturers and retailers won't tell you peanuts so you just have to go with the top 5 questions above. I would also look for pinholes but it would take some training to spot these ;-)

Now on to SP's full carbon bonnet. It's 100% carbon with 4 layers for the top bonnet skin alone and 2 layers for the bottom skeleton. The resin used is classified (sorry) but suffice to say it's not gel coat and it's not epoxy. I've elected to retain some of the bottom skeleton bracing as I feel under skeletonless bonnets do not provide sufficient strength and support. Rap your knuckles on the bonnet and it sounds metallic. The bonnet is also very stiff in feel compared to other local carbon bonnets. Weight is 5.5kg only. Installation took quite a while as "adjustments" needed to be made to the latch and lock assembly to get a perfect fit. I also took the opportunity to fit a new grille from the Wira SE and clearcoat the bonnet with Glasurit lacquer. Will talk more about the new grille in a separate article. Clearcoating and finishing the bonnet was a real pain and took many many hours, days and $$$$. In general you need to do the following:
1. Sand the bonnet down with 180, 240 then 320 grit sandpaper
2. Apply (spray) clearcoat
3. Repeat the process until you get the finish you want to your standards

By nature of the carbon lay-up process surface imperfections are often a very common sight and it really takes a lot of work and skill to get good finish quality. Reverie UK (popular cf maker of performance parts for Lotus Elise and Caterham) actually carry this disclaimer on their
web site

Picture of SP with new bonnet and grille fitted. Fitment is near perfect. What do you think bout the surface definition and quality?

Another shot with flash

Closer up and with flash to show straightness of weaves

Look at how thin and sharp the edges are

Picture of bonnet under skin and bracing skeleton. The bonnet is able to utilize back all the stock rubber seals.

Another under skin pix where the windscreen washer rubber piping runs to the windscreen cleaner nozzle

Bonnet incorporates double latch assembly as per stock bonnet. Latch hook is stainless steel.

Another arty close up front nose shot

Next steps would be to fit the Aerocatch bonnet pin that is currently gathering dust in my room. I think I'll also take a breather from carbon parts for a while as I'm dead broke (you don't wanna know the cost of the bonnet in material cost alone) and need to recover physically and mentally. More pictures in my upcoming new grille article. Oh and does anyone want to buy an excellent condition metallic grey coloured stock Putra bonnet?

Tuesday, February 14, 2006

Jack's Water Injection Install

Here's an article from my bro Jack on installing water/alcohol injection. Words and pictures from the man himself.

Actually, I wanted to keep this hush hush but what the heck, good things must share mah. I've just completed a water injection kit install from Cooling Mist. This I chance upon initially looking for an intercooler water spray system. Together with another nuthead we purchase the kit off the above website. They were very efficient people answering all my initial questions and even customizing a kit for us. I took the turbo and the other fellow the turbo/na option. This enables us to share the cost of shipment. Shipping cost about USD70++ alone due to the weight and size of the 2 kits. However, the kit arrived within a week and I had to pick it up from the nearest pos m'sai depot. Ask them nicely they will fix the tax for you #$@&%*!.
What the kit came with for my so called deluxe single stage setup.

1)100psi pump. (6.894bar)
2)Water Solenoid.
3)3.9gph Injector and injector holder.
4)Boost switch set at 10 psi.
5)Flow detector switch and LED indicator.
6)High temp/pressure Teflon hoses.
7)Brass barbs for solenoid and water pump.
8)All electrical connectors, cable ties, fuse, hose clips, relay and wiring diagram.

All the items were tested before being shipped to me. When I opened the covers for the pump there are still traces of water in it. Installation was not a breeze as the engine bay is already cramped. I had to sacrifice some space in the glove compartment to mount the pump in there. Let's hope that the GF's stuff still fits and she does not notice the pump. Water is drawn from the existing water hose from the rear windscreen nozzle. I had to clean the water tank and Oh, did I mentioned that my rear windscreen effectively has no water to clean it.. Bah, I seldom look back anyway.
The Kit

The Pump mounted

The electrical wiring for the kit was easy to do. In fact I can do it myself. Installing the kit took about 2 hours as I insisted that all the wirings are to be shrink wrapped and that the components be as inconspicuous as possible. First to be done was the pulling all the water hoses. Second, location of the boost switch, solenoid and water flow detector. The system works on boost. The boost switch comes pre-set at 10psi = 0.689 bar. This means that when that pressure is detected by the switch, it sends a signal to the solenoid asking it to open and the injectors will spray. The flow or clog nozzle detector is used to detect any flow or problems with the system. Wired properly, at the preset boost when the injector starts spraying the green Led lights up. It goes off when the boost falls below the activation point. Stays lit when the injector is clogged and does not go on when there is a leak or no water in the tank. A very nifty device. For this system the water injector is mounted just before the throttle body. Its so well hidden that you dont even know its there.

The Injector holder and Injector

The boost sensor

Water solenoid, injector installed in IC piping and flow / clog injector sensor

In-Cabin LED to know if the system is working

After full install

With the kit installed its time to test it on the road. Reach the highway, floor it a bit.. see 0.7bar, Led goes on and you feel a slight surge of power, out from the norm, from the engine. EGT was recorded at 750-780c at peak boost! That's about 70-100c lower. Cool! After a few hard runs the Led does not light up!! Bugger.. I popped a hose as the cable ties are useless. Switch to some good quality hose clamp and problem solved. Usually, the intake gets so hot as it will burn your hand when you touch it immediately but with the kit its only warm and you can leave you hand there before the heat soaks it up again

The kit really shines after many hard runs as the power feels considerably smoother and consistent. Even being stuck in a jam along the LDP, heat soak problem solved? This is what the butt dyno is telling me. Not sure of the actual gains until I take it for fine tuning later next month. Coolmist claims that they have reported a 20-25hp gains from the kit from the box and that the intake temps reduced to ambient temp. I do not have an intake temp gauge and cannot verify this. It will also steam clean the engine for you. Via customer feedback and their own testing, the kit allows you to run more aggressive timing and leaner fuel maps. I will keep you guys/gals updated on the gains when I go for fine tuning later.

BTW, the other nuthead has a NA/Turbo o2 kit meaning he has purchased the vacuum and boost switch together which allow him to either run aggressive timing and high compression Na or force feed it later. For a brief description of water injection theories google it or go to Rally Cars Water Injection article. This is just one of the many that I've found. There are also many cool upgrades available from Coolmist. Check them out if you're interested. Although less sophisticated than the Aquamist System, the retail is about half the price with good quality parts. Methanol and Alcohol safe too!!

Saturday, February 11, 2006

TMM Archives - Carbon Pedal Extensions

The stock pedals are really spaced too far apart for effective heel and toeing. My bro David made these pedal extensions from carbon. These are larger in size compared to the stock pedals

Fittng was quite a pain as the stock pedals had to be drilled. Nothing a professional installer can't do in bout an hour or so. Picture below of the installed pedals in the SP. Fasteners are stainless steel.

Pedals can be fitted to the Satria R3 too. Here's a picture of the pedals in fellow bro Vernon's aka Crash's SR3

Tuesday, February 07, 2006

Power Enterprise Super Strong II Timing Belt

For those who are running 'big' cams with aggresive lift ramp profiles should consider getting an upgraded timing belt. The stock timing belt has been known to fail in less than 30,000km if thrashed regularly on big race profile cams. With this in mind I did some research and discovered that Power Enterprise in Japan do make such a belt for the 4G93. Actually the timing belt is meant for the CA4A Mirage Mivec with the 4G92G MIVEC engine but lucky me that both the 4G93 DOHC and the 4G92 MIVEC engine both share the same timing belt. The Mitsu/Proton oem part number for this belt is MD176389 while the Power Enterprise part number is BM121. If you have the 4G93 SOHC engine or 4G93 with MIVEC head transplant this timing belt will not fit.

The Power Enterprise Super Strong II timing belt was developed in 1997 and has been used by many race winning teams. This timing belt features Kevlar and Nylon fibre for the tooth fabric over high efficiency rubber cord and has a durability 2.6 times over the conventional timing belt. I got my timing belt from M Power speedshop in Penang. The same belt can also be found in many other speed shops including N1 Racing, KSP Power, etc. Picture below of the package.

Picture of the Power Enterprise Super Strong II Timing Belt. Don't particularly dig the Smurf Blue colour but at least it's not purple like HKS's Fine Tunepeformance timing belt.

Installation should be done by a trained professional and was done by my regular mech. The whole job took about 3 hours total. Also took the opportunity to replace all related seals and bearings. Picture of finished installation. My adjustable cam pulleys are Z. Speed aka Skunk2 if you wanna know. The pulleys are machined from 6061 aluminium alloy and hard anodized. Smurf Blue over Red really stands out don't you think? Shame everything's under my carbon timing belt cover..

Saturday, February 04, 2006

Senior's Carbon Front Bumper Lip

While I was having my full carbon bonnet fitted 2 days before CNY, Senior also got his angpow same time in the form of a carbon bumper lip. This project was about 6+ months in the making and Senior had to sacrifice his original lip for David to make a mould. As you can see the results are worth it. Picture below shows the bumper lip/skirting before attaching to bumper. Weighs peanuts compared to stock polyurethane bumper lip.

David even took the trouble to make a separate cf piece for the tow hook cover. Outstanding!

The bumper lip is attached to the bumper via rivets. Due to the way cf parts are moulded there is to way to mould the tabs on the stock bumper lip as these are injection moulded. Don't ask me why Senior's using stock el heavo bendo GTI rims on his 300hp monster.

To say Senior's chuffed at the effort is an understatement. He's now pestering David for carbon bumpers and sideskirts. And if you need to ask, the the bumper lip only fits the GTI bumper and nothing else. Not even the standard Proton Wira/Satria/Putra bumper. Believe me we tried. Sorry..

TMM Archives - Carbon Pillar Garnish

I know I know. This doesn't make the car lighter or go any faster but sure does look trick. And since this is a popular mod for carbon mad Japan nowadays being sold extensively by the likes of Varis and Blitz I thought I'll just make one for myself. The black finish on my door pillars were also beginning to fade after 5 years so this gave me an excellent excuse for the effort. Picture below of the carbon pillar garnish before application.

Closeup. Weaves straight and perfect eh?

Pix after application of the carbon pillar garnish. Attaches via excellent quality 3M double side tape

TMM Archives - Ported 4G93T Inlet Manifold

A fellow TMM forumner suggested that I republish some of my old postings from TMM forum since the most of the pictures are missing due to the limited space available. So here's the 1st one from me.

For those of you out there running big cams and a ported cylinder head, moving to a Mitsubishi Lancer GSR CD5A - 4G93T engine inlet manifold will give you slightly more top end. This is due to the shorter runner configuration on the 93T's inlet manifold. Picture below of the 93T inlet manifold. I bought the inlet manifold used from Ralliart Australia way back when this was a relatively unknown mod. To get the like new finish you have to brush the inlet manifold with a steel brush and use lotsa engine degreaser/cleaner

Apart from the shorter runners the 93T inlet manifold is also lighter (did not have the opportunity to weight both manifolds but my hand carry weighing scale definitely indicates the 93T to be way lighter) than the 93P and does not have EGR (Exhaust Gas Recirculation). You can find out more about EGR in MrFixit's web page. Now unless you're a greenie (which you probably aren't if you run big overlap cams) EGR is a definite no-no for highly modded and forced induction engines.

I've also decided to port the flange entry and exit points of my 93T inlet manifold to accomodate the larger 60mm throttle body I'm using and also to fit the huge ported inlet ports on my Matspeed 93T RS cylinder head. Picture below of my 93T inlet manifold's ported throttle body inlet flange

Picture of the ported outlet flange

I was initially worried that the extensive porting might cause some low end powerband losses but happily my concerns were unfounded. This is probably due to the efficiency of the Matspeed race ported cylinder head requiring the increased in volume of air. Butt dyno indicates gains everywhere along the rev range. No kidding! Picture below shows the stock 93P inlet manifold vs ported 93T inlet manifold.

Installation was a no brainer and took bout an hour. Do make sure to plumb the vacuum hoses correctly. This is probably as far as you can go with a single plenum inlet manifold though I've seen the Honda B series inlet manifold fitted to our 93P I kid you not. The next step for me would be individual throttles. Stay tuned...